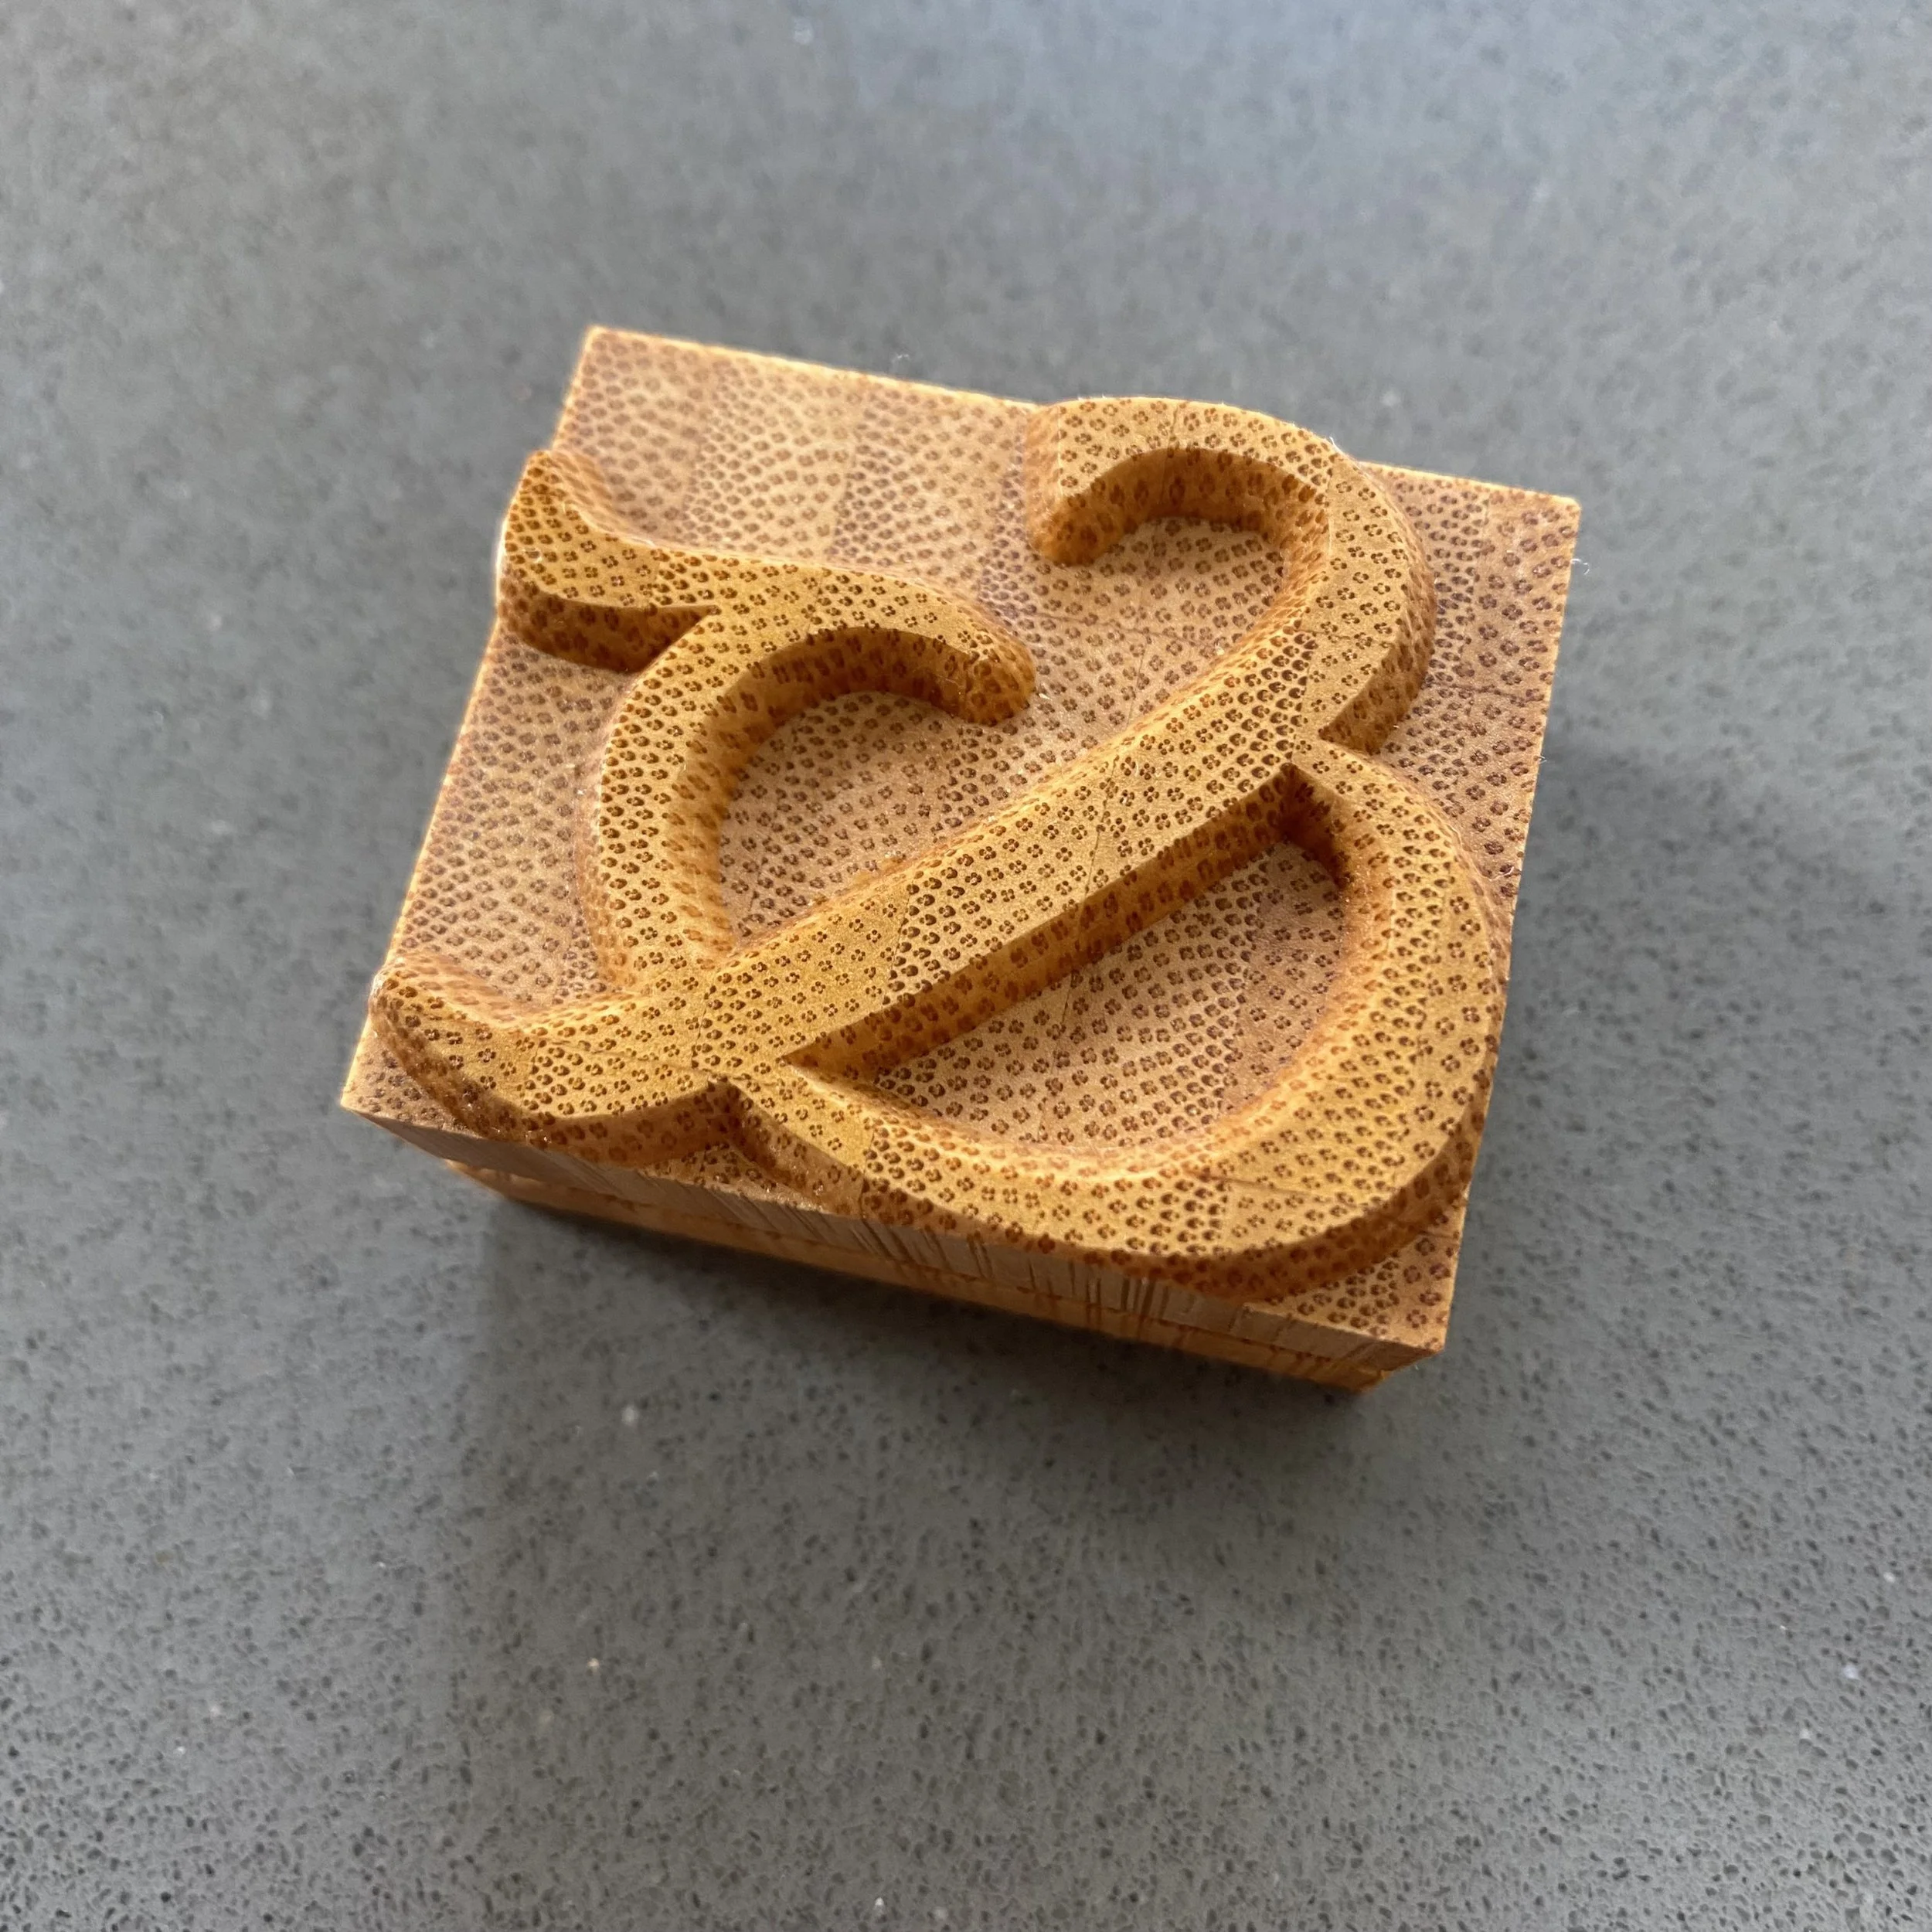
How to make bamboo type for letterpress printing
Update 1/3/2026
Easel Pro now supports the Nomad 3 CNC Milling Machine. Once paired you no longer need to add the spindle speed to the g-code after exporting. Once you have installed the driver there should now be an input box under "Cut Settings" for the spindle speed. Just be sure to input 18,000 rpm's in the correct box before exporting.
Notes that have a strike through have been changed or are no longer necessary, refer to these updates for changes. Thank you!
End of Update
Before you begin please make sure you take the time to familiarize yourself with your milling machine and have a basic understanding of CNC machining and safety practices. I am not affiliated with any of the companies mentioned below. These instructions detail how I am currently making type, proceed with caution and the use of this information is at your own risk. Let me know if something isn't clear or if you would like more information about a specific topic. This is a work in progress, expect many changes to come.
All of my g-code and .svg files are available upon request including Amplify, just send me an email!
Step 1
Gather equipment, tooling, software, and materials. Many of the items below link to where you can buy the actual product.
Equipment
A computer with internet access (Windows 10 or higher, MacOS 11 (Big Sur) or higher. You will want a computer with good 3D capabilities.
Nomad 3 Desktop CNC Milling Machine made by Carbide 3D
Corner Square
Precision 1-2-3 Block
Calipers
Thickness Gauge
3D Printed Nomad 3 Dust Boot w/ Brush
Rockler Dust Right FlexiPort Power Tool Hose Kit
Stihl SE33 Wet and Dry Vacuum, 3.2 gal, 127 cfm Air, 1 kW, 120 V
Automated Vacuum Switch by OONO
Tooling
Helical 01150 3 Flute End Mill 1/4" Diameter x 1/4" Shank
60° V-Bit 1/4" Cutting x 1/8" Shank from Inventables
1/8" Downcut - 1/8" Cutting x 1/8" Shank from Inventables
Alternate 1/8” Downcut Bit from Amana Tool (Longer and easier to work with)
Software
Carbide Motion - Included with Nomad 3
Inventables Easel Pro Subscription
Materials
Bamboo 7" x 7" x 1" End Grain Board (Save money by buying in bulk)
Micro-Mesh Sanding Pads (1500 & 3600 grit only)
Step 2
Set up your mill & make a couple projects to help you on your way
The step below should no longer be necessary, please refer to the update at the top of the page.
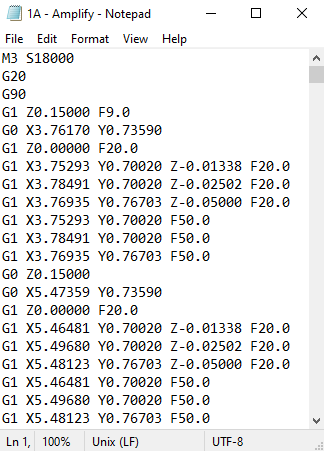
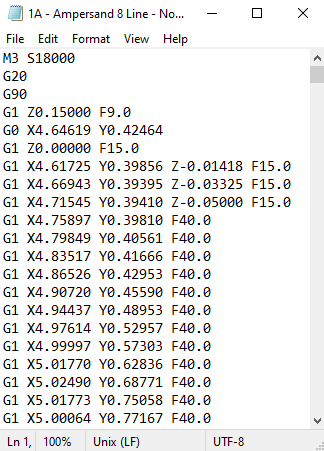
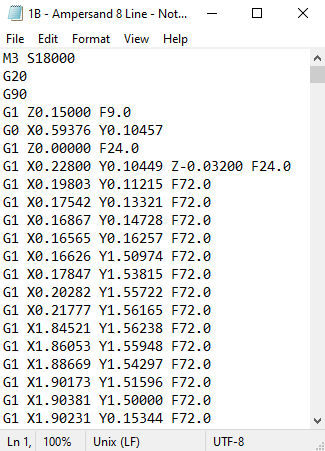
IMPORTANT! If you are using the Nomad 3 in conjunction with Inventables Easel Pro you will need to add a line of code to the top of all exported g-code files. This code turns the spindle motor on and sets the spindle speed. For bamboo I set the spindle speed to 18,000 rpm's. The code is M3 S18000. WITHOUT THIS CODE THE SPINDLE WILL NOT TURN ON AND YOUR MILLING MACHINE WILL CRASH! YOU NEED TO ADD THIS CODE TO EVERY EXPORTED INVENTABLES G-CODE FILE. Please refer to the example below.
Set up your milling machine and dust collection system then make a few projects. I suggest making some calibration blocks (you'll need these later). I made my calibration blocks out of the same bamboo that I use to make my type. You'll need to make two, the first one should be precisely 2" x 3" x 0.960" and the second block should be precisely 2" x 3" x 0.918".
Tips for making the calibration blocks
Securely attach your corner square to the lower left corner of the Nomad threaded table (going forward, the lower left corner will always be used as the home position). Use a dial test indicator to make sure it runs perfectly parallel to the spindle.
Use the 1-2-3 block and the bit zero tool that was supplied with your Nomad 3 to set the home position to the lower left corner and the material height to exactly 1". Now you have a starting point to mill the first calibration block down to 0.960". If you are making these out of end grain bamboo the Helical 01150 1/4" end mill will leave a nice surface finish, be sure to mill both sides. Once you have both blocks made you're ready to start making some type-high material!
Step 3
Type-high material
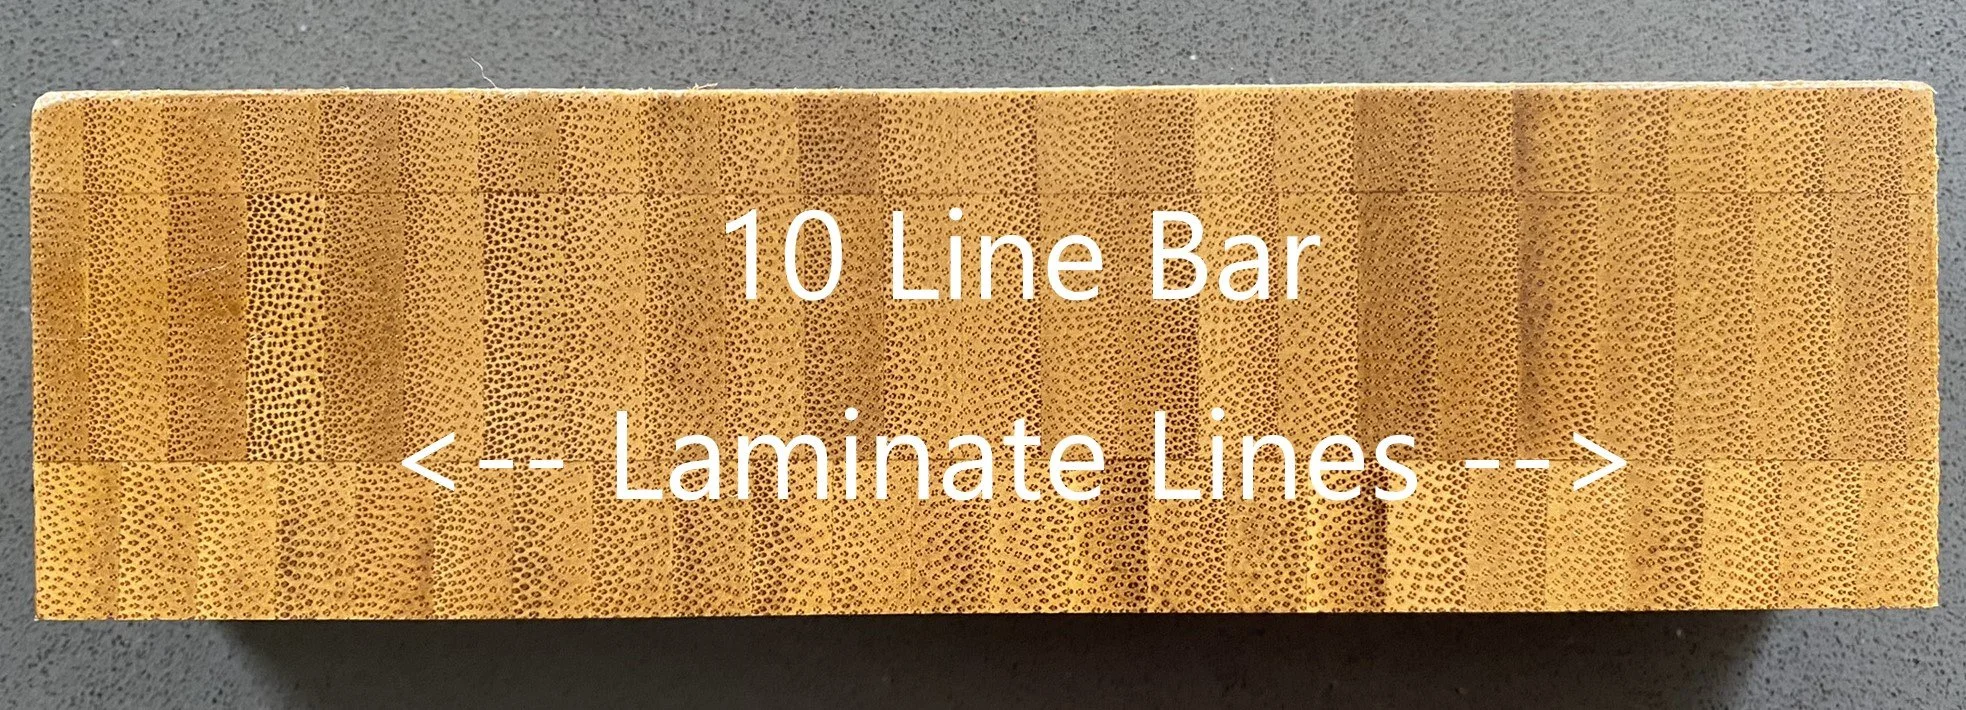
First you'll need to square up and trim out the bamboo boards so they fit nicely on the Nomad threaded table with room for the toe clamps. I do this on a type saw but you can also use a table saw with a good fence. The final dimensions of the board should be 40 x 36.4 picas. It's important that the laminated sections are running end to end across the shorter dimension (36.4 picas), this helps prevent the laminated sections from breaking later in press.
Step 4
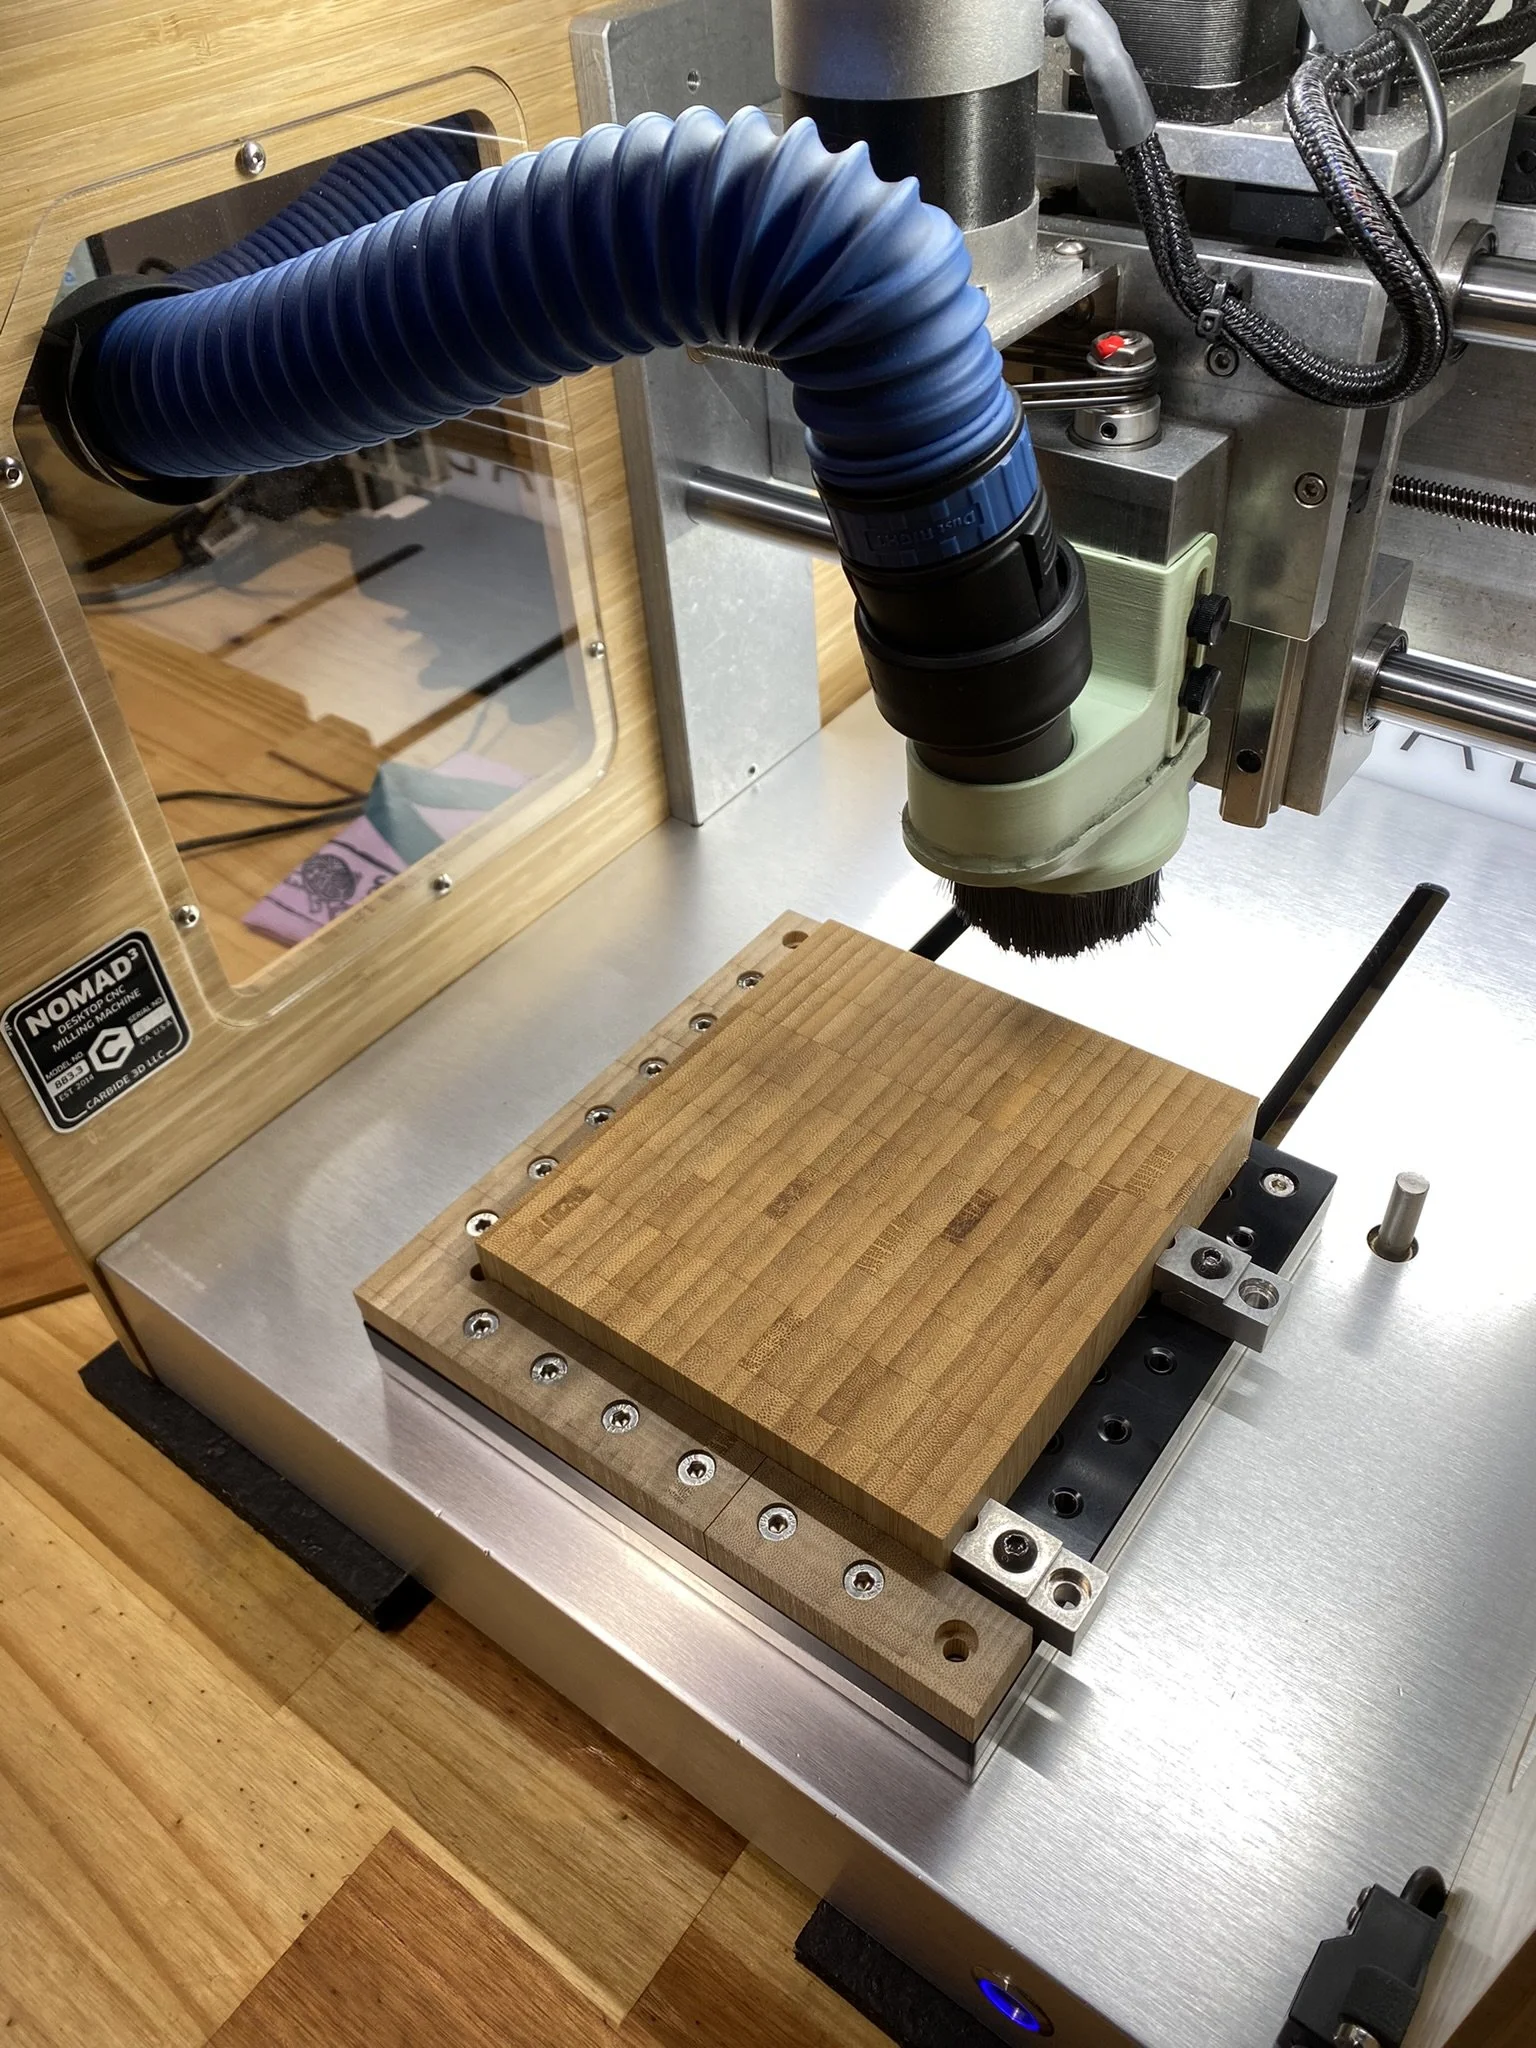
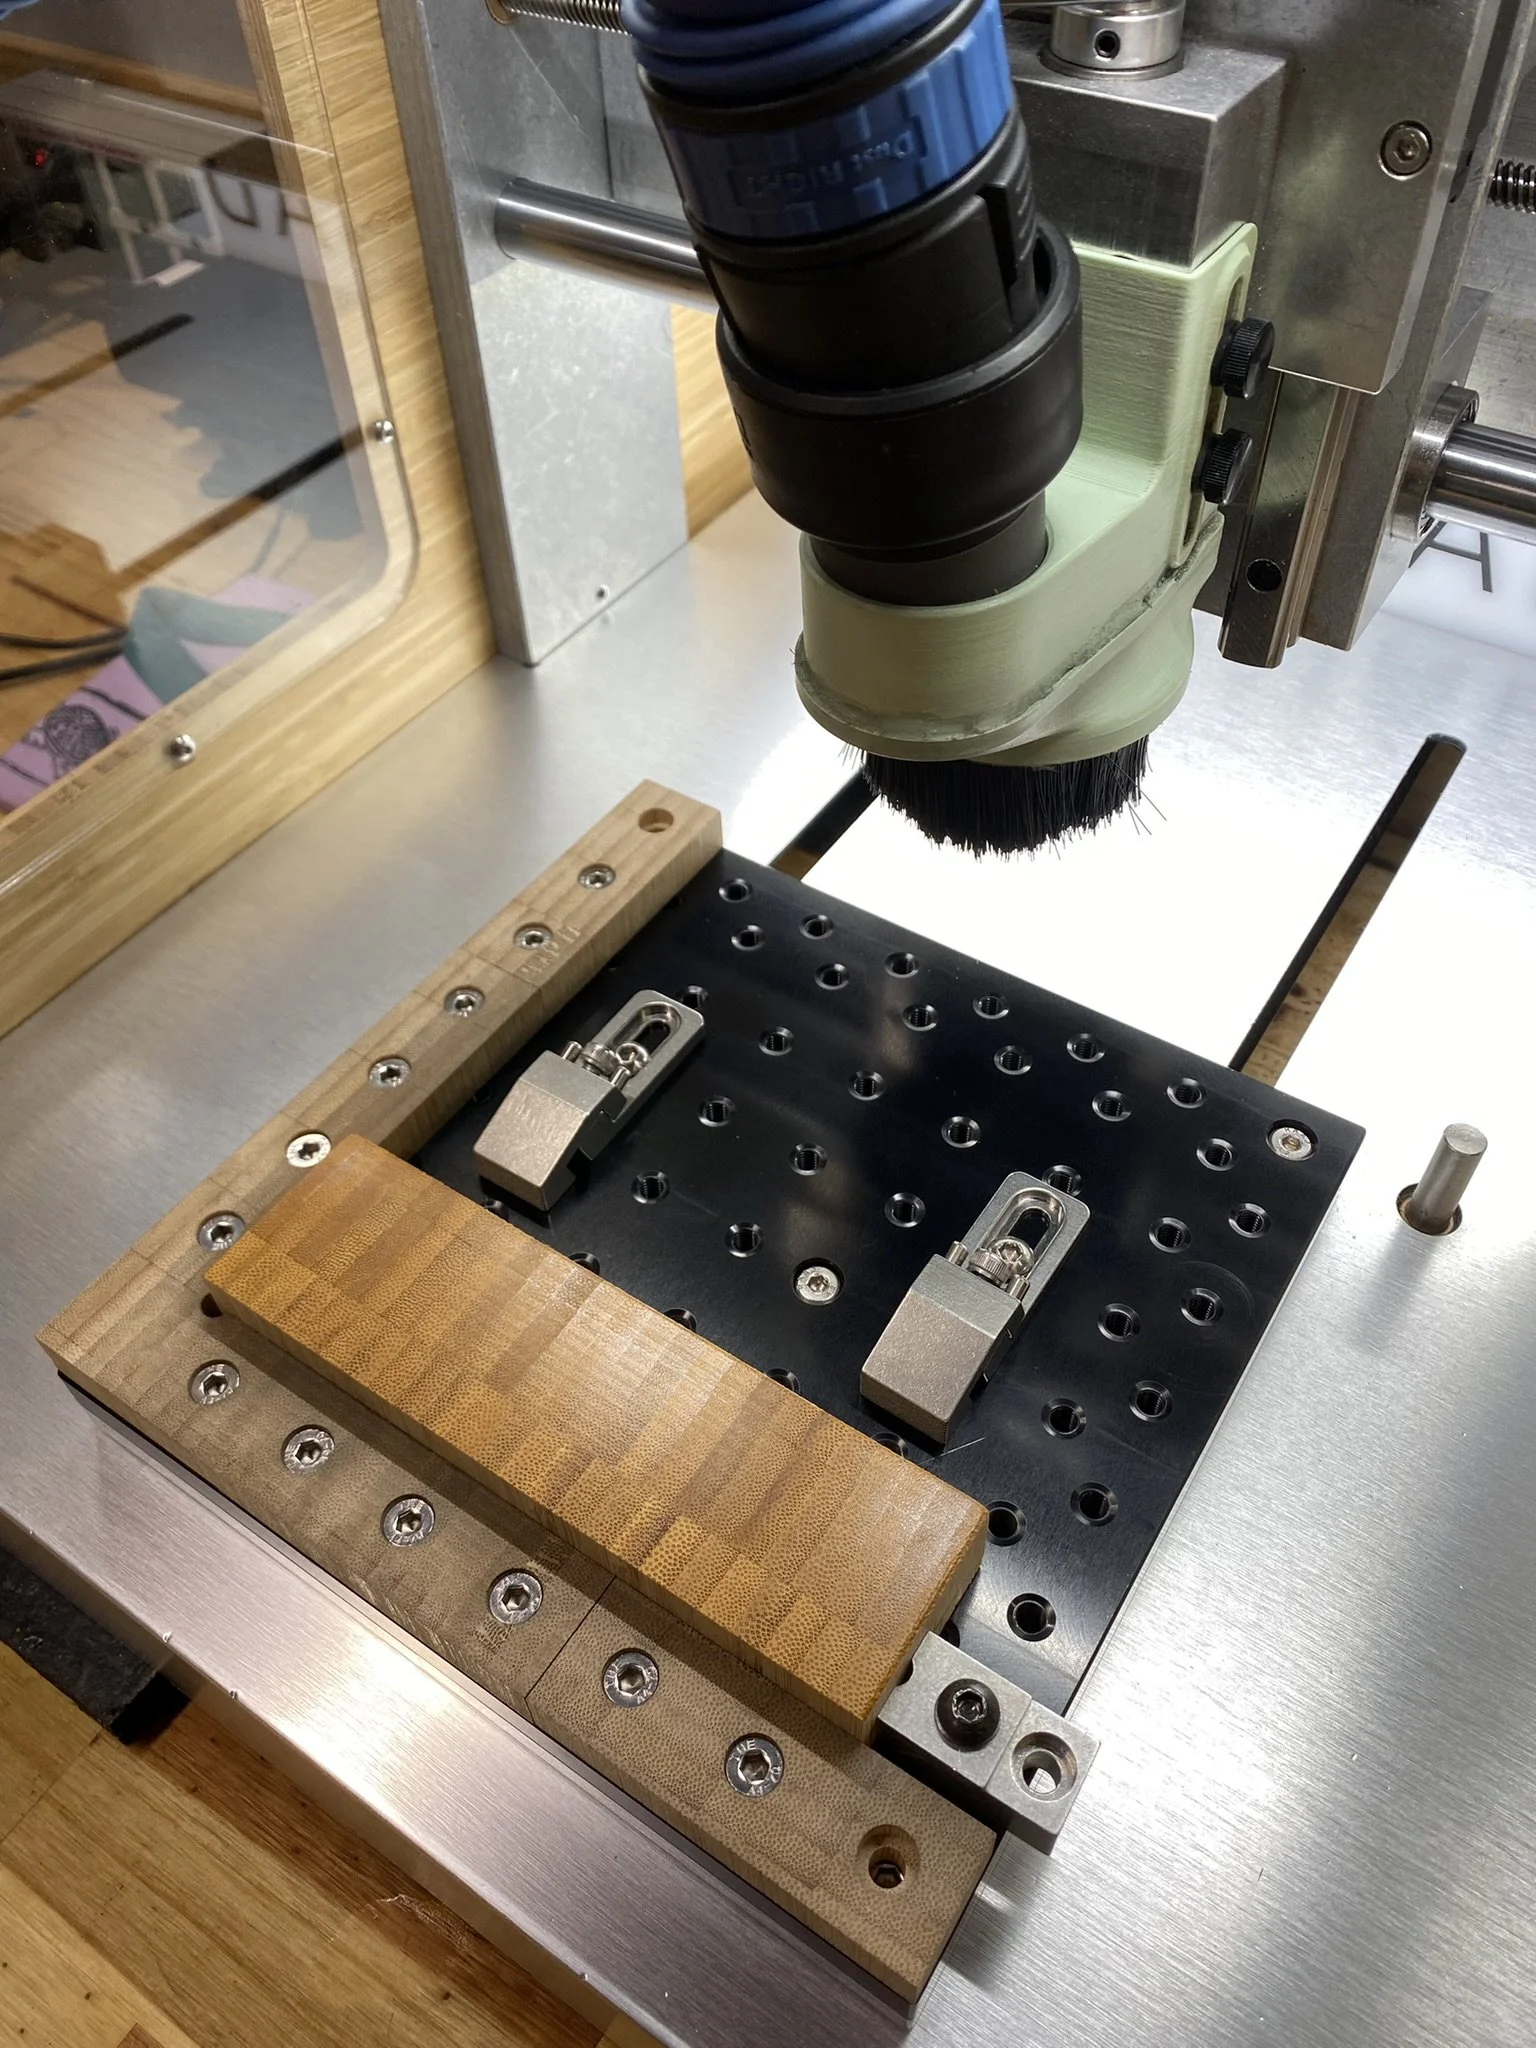
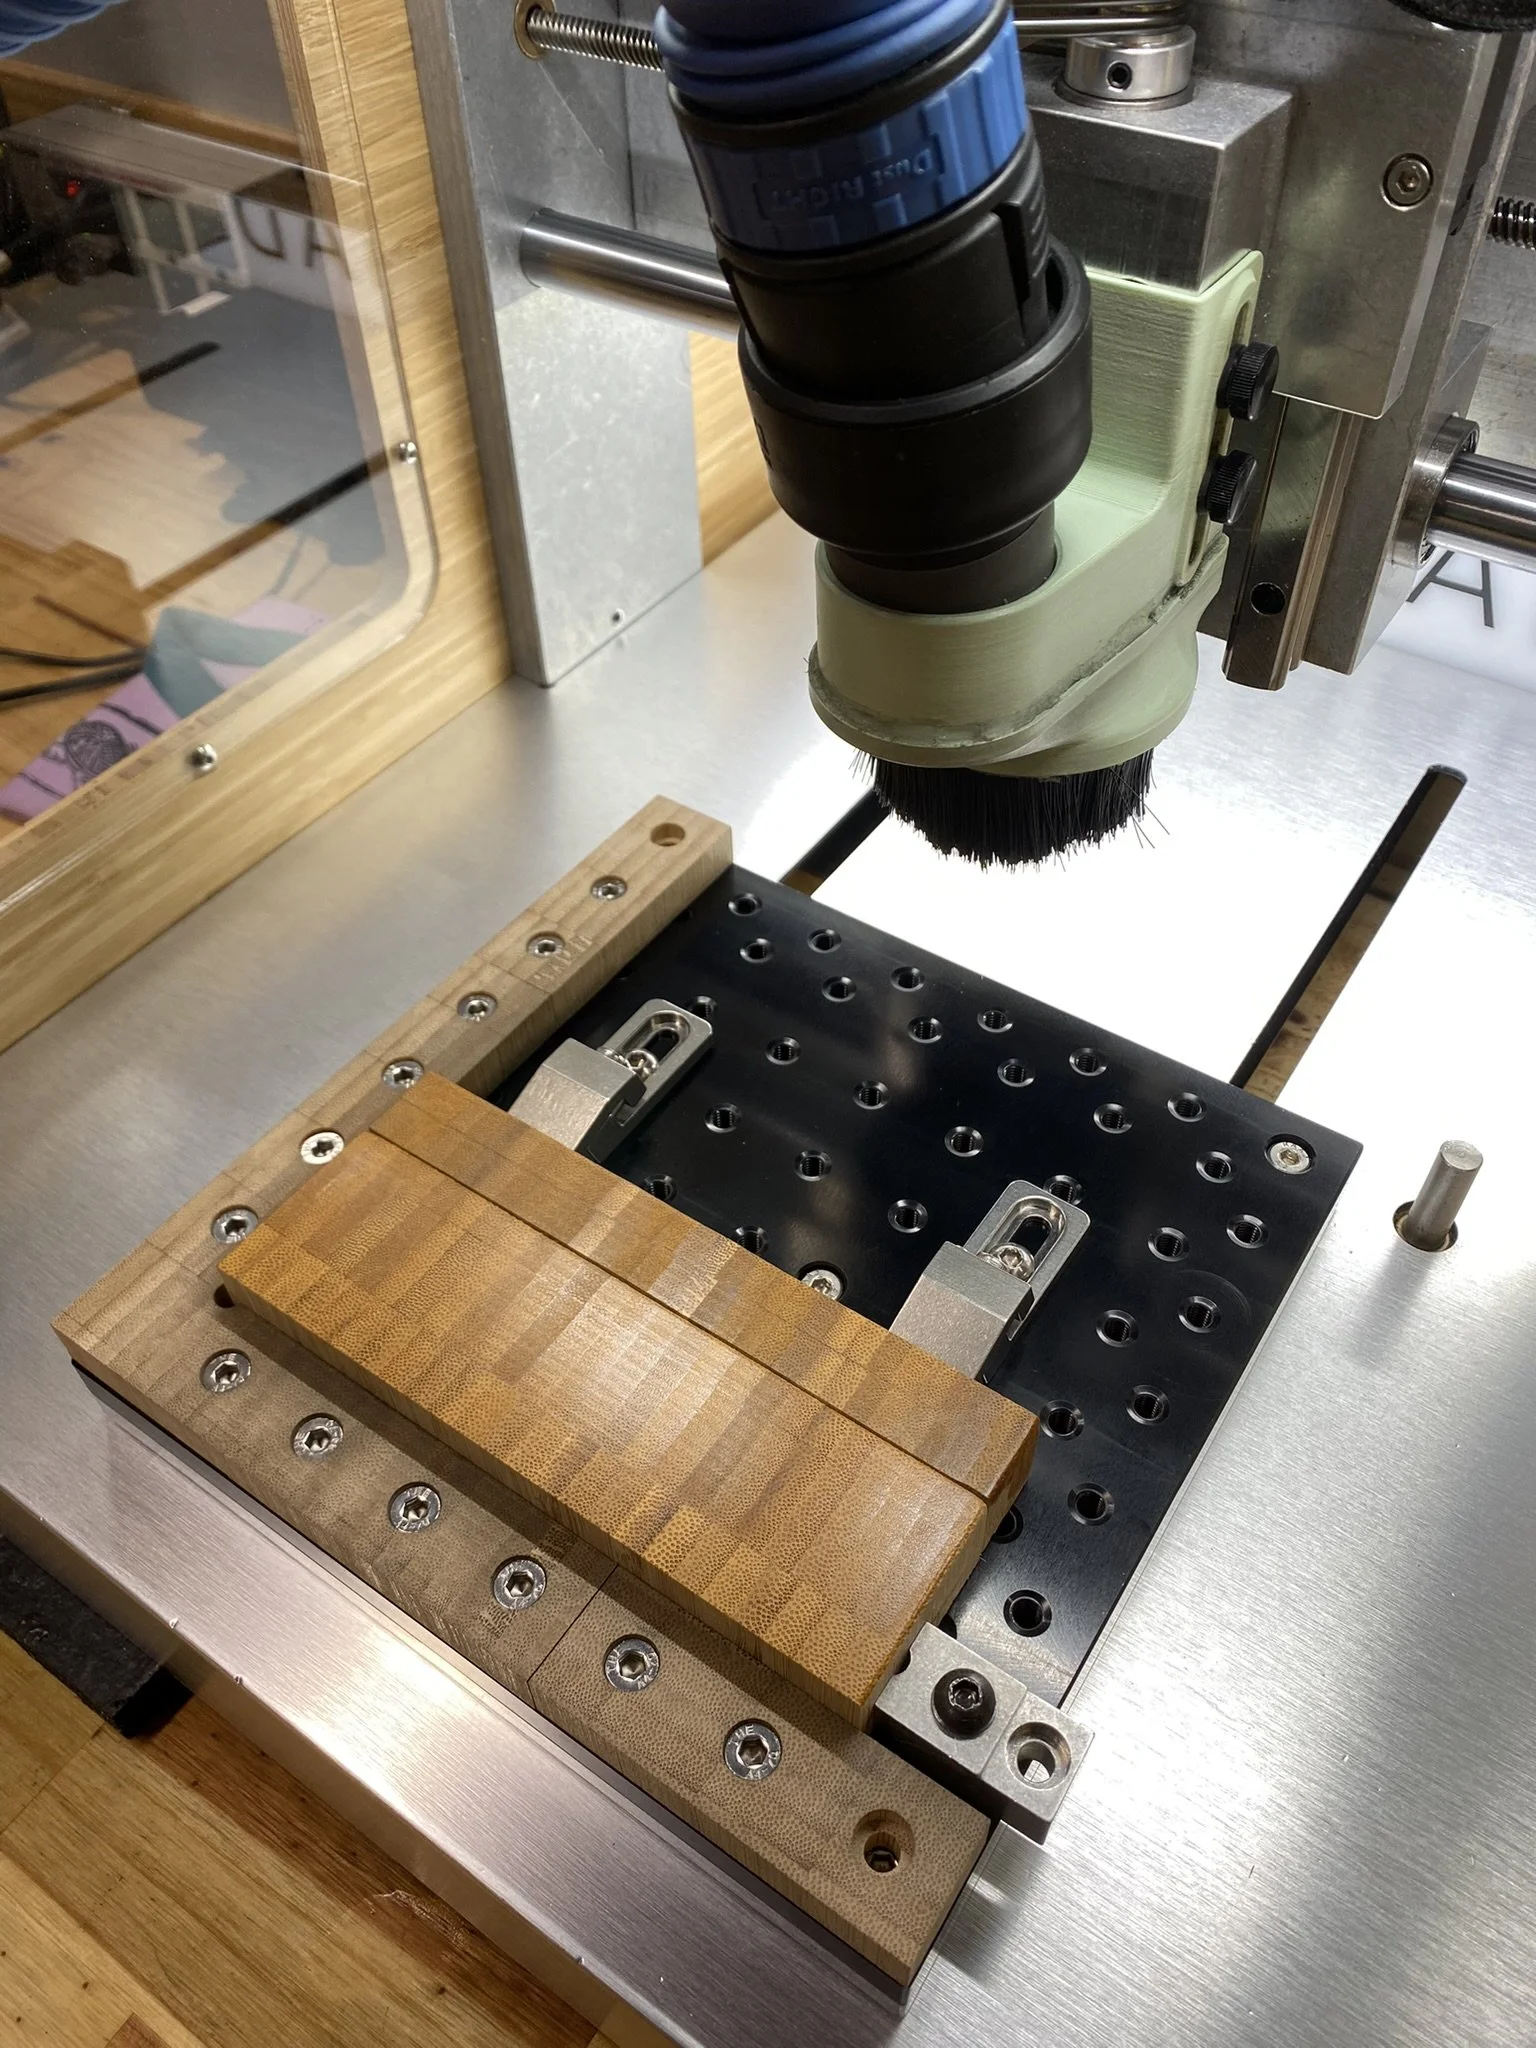
The next step is the most important and can be a little frustrating -- milling the boards to type-height. Refer to the photo below to see how I lock up my material in the mill. Every time you lock up a new board you should clean off the table, I use a 2” paint brush for this. Any debris or dust left behind can result in the board being a couple thousandths shy. Set the initial height for the first pass of the material to 1" using the 1-2-3 block. You need to mill both sides of the board, so you should remove approximately 0.041" from both sides to land somewhere near 0.918" (type-height). My personal mill is consistently off by 0.003" so the first pass I take 0.040" off and when I flip the board for the second pass I'll mill the remaining 0.038".
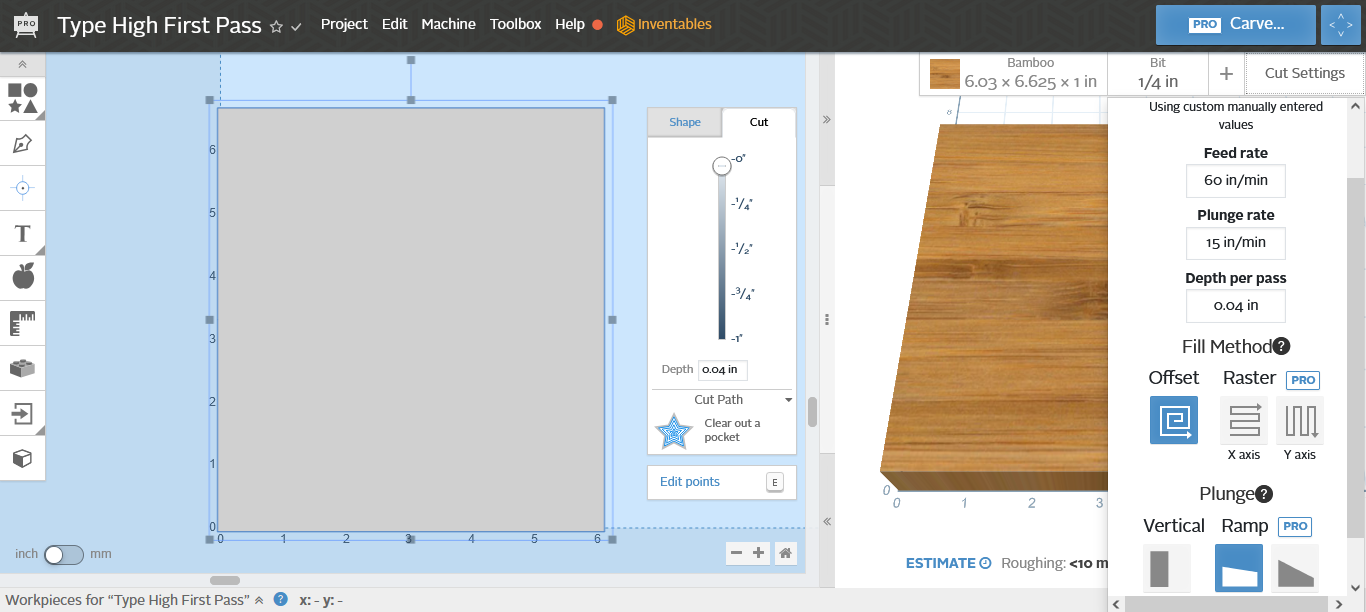
I used Easel Pro to write my g-code, refer to the photos and be sure to take note of the feeds and speeds and other parameters. Install the 1/4” Helical 01150, then mill one side from every board before you flip them and do the other side. For the second side you need to set your height to 0.960" using the calibration block you made; be sure to also change your material height in Easel Pro to match for the second pass. Once you have both sides milled on the first board, measure it and make any necessary adjustments to your height in Easel Pro before continuing. I measure multiple points on every board before I'm confident that it's 0.918" across the entire surface. For every 50 boards I mill, 5-7 boards always come out slightly undersized, I use these for spacing material or in-house woodblock printing.
Step 5
Preparing and sealing the surface for printing
Now that you have some type-high boards we need to make them suitable for printing. Examine both sides of the board and select which side has the least amount of imperfections, this is the side that we will prepare. Start by thoroughly sanding the top surface with a 1500 grit micro-mesh sanding pad then finish with the 3600 grit pad. Next apply 3 thin coats of shellac, I apply the shellac with a folded rag. Working quickly, start at the center of the board then work your way out in a circular motion towards the edges (A little dab will do you!). After the surface is covered, quickly go back and wipe up the excess in the direction of the laminated lines. Wait about 30 mins for each coat to dry, lightly sand with the 3600 grit sanding pad in between each coat and after the final coat.
Step 6
Programming the type to be carved
Most of the time I convert my images to .svg files then import them into Easel Pro. There are many ways of doing this. A really simple and free resource for converting your files is Convertio, the converted .svg files are of very good quality. If something isn't quite right with the conversion you can always convert the new.svg file to a .bmp, make your edits, then try again.
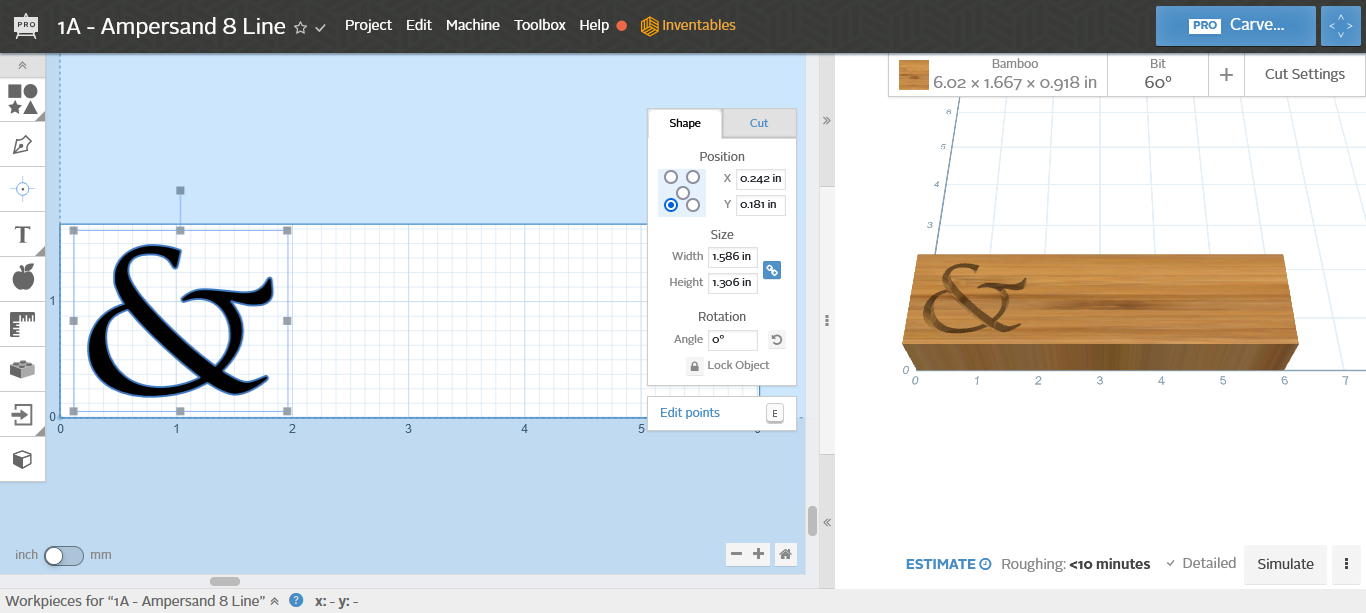
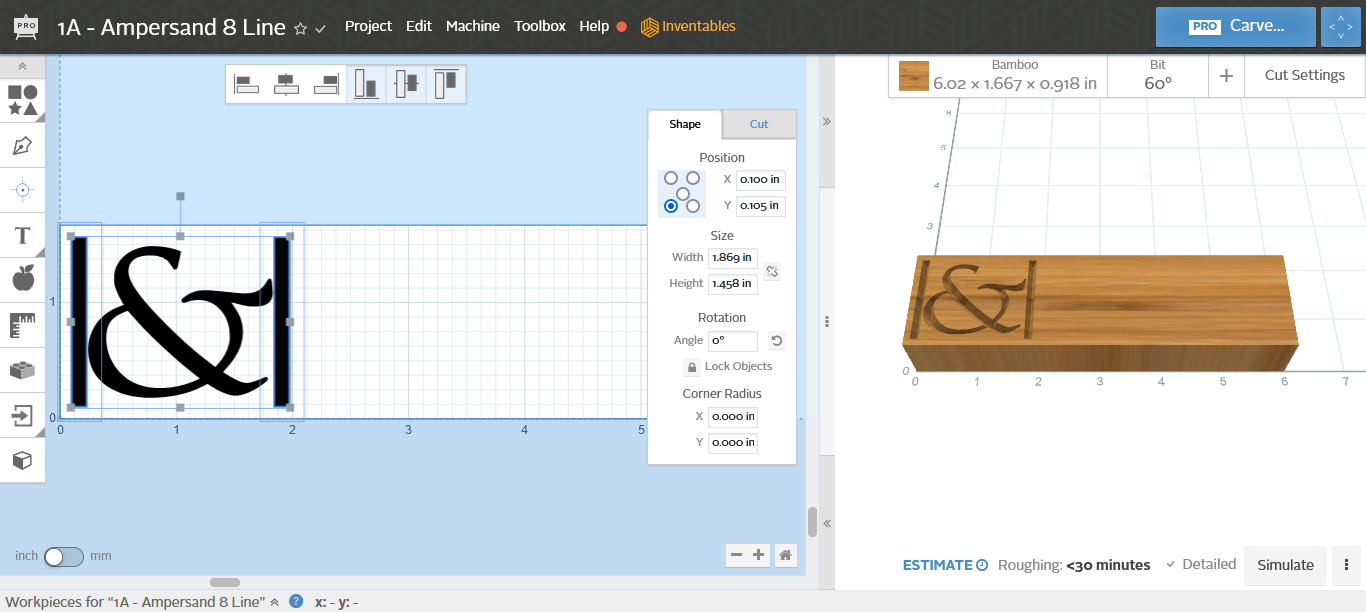
Now that you have your .svg file you are ready to import it into Easel Pro. Input the material dimensions, for this example I'm carving 8 line type on a 10 line bar. Import your file, then resize it to the desired line height. It would be a good idea to make a conversion chart at this point (points/lines/picas to inches). Lock the height and width dimension in the shape menu then input the height you would like the type to be. I always reduce the height and width by two points so you'll have room to safely trim it out, e.g. if the type is 8 Line (1.33344") subtract two points (0.02778") and input 1.306" into the locked height parameter to shrink the image concurrently while preserving the aspect ratio. Reposition the image so it's centered on the material -- 0.181" from the bottom (Y) and 0.242" from the left side (X). Designate this file as 1A.
Now we need to tell the CNC milling machine how to trim out the type. We'll create the tool path by making two long rectangles that are 0.128" wide (room for the 1/8" end mill) and 1.458" tall (the height of the type plus 1/8"). Center these and position them one point away from the edges of the image. The left tall rectangle should be 0.100" from the left side.
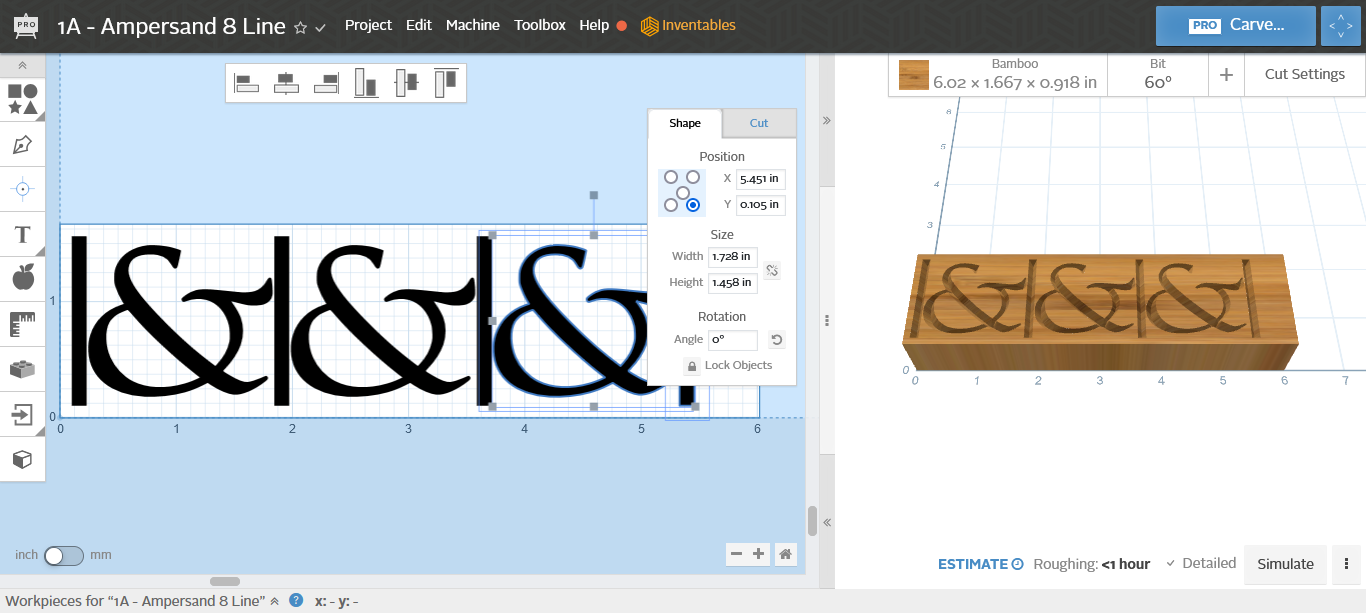
If you want to make multiples of the type you are working on just copy and paste the image plus the right most bar until the material is filled up, making sure to add an extra point between the copied image and the previous bar.
Next add the top and bottom bars, they should again be 0.128" wide and the total length of everything combined. Position them one point above the top of the image and one point below the bottom of the image. They should also be 0.100" from the left edge of the material. After they are in place verify that the body of the type is the correct line height. In this example the body of the type is now 8 line (1.333").
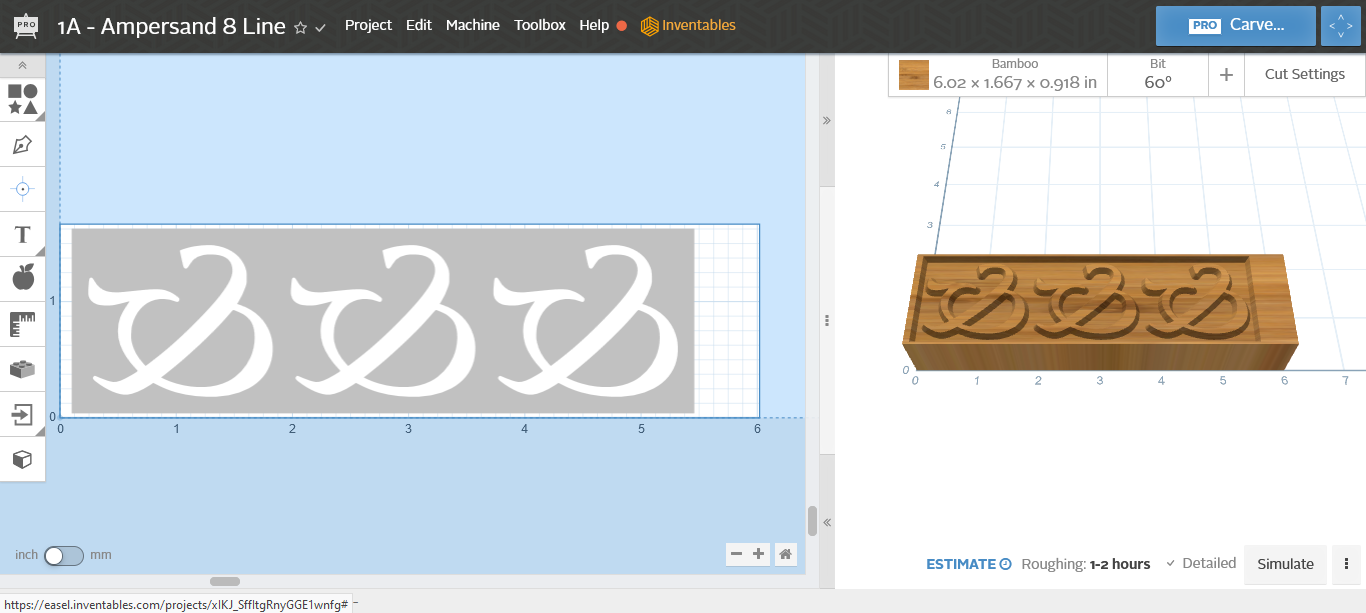
Now that everything is laid out we need to mirror the image so it will print correctly. Select all (ctr+a) then select the “Apps” button in the side menu. When the app library window opens select stamp maker (how cool is that!!).
Click Import. Right click and delete the new large black rectangle. Single click on the new grey rectangle and set your depth of cut to 0.100". Resize the grey rectangle so it has the same outside dimensions as your trim out bars. This is a good time to make sure the correct bit is selected. This will be the file (1A) we use to carve the image or face of the type so you should select the 60° v-bit. I use 60° v-bits to carve all of my type (a subscription to Easel Pro is required to access v-carving), it takes a little longer to carve but you won’t need to change your tool multiple times or create additional tool paths and programs. You will achieve much finer detail and since all edges will be chamfered, your type will be much stronger. Next, select manual under cut settings and input your feeds and speeds and other parameters. Refer to the image to see what I'm currently using.
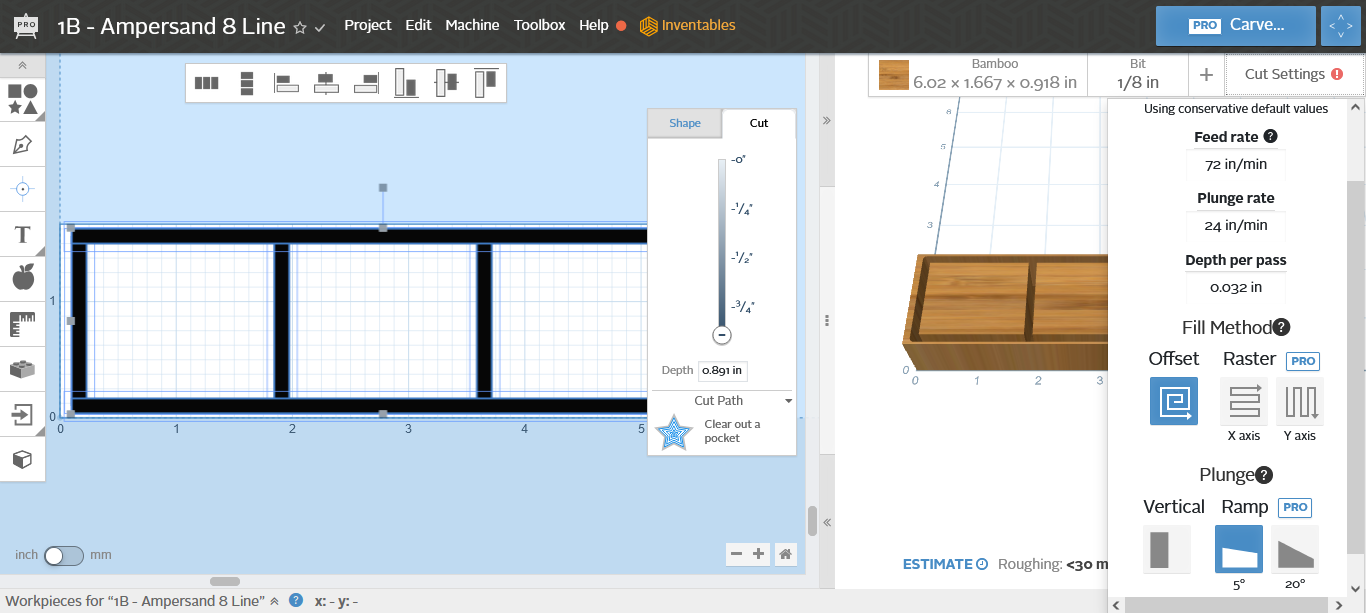
In the next step we will make a separate file to create both the carving program and the trim out program. Select "Project" from the drop down menu then click “Make a Copy”. A copy of the project will open in a new tab, rename the new project to 1B. This will be your trim out program. In this file delete everything except for the trim out bars. Change the depth of cut to 0.891". I choose to not use a spoilboard to reduce waste and avoid issues with the type not sitting flat. This is why we deleted the black rectangle with the tabs after importing from stamp maker. This can be risky so double check and quadruple check all of your parameters so you don't accidentally carve into your table. Set your bit to the 1/8" down cut bit and input the other parameters (reference the photo below). When you’re installing your 1/8" bit make sure it is long enough to cut to the required depth without bottoming out on the spindle nut. The 1/8" down cut fish tail bit from Inventables (at the time of this writing) does work for this but just barely.
Return to the 1A project and this time only remove the trim out bars.
Double check your work then export the 1A and 1B projects to g-code, select the "project" tab then "download g-code". Once you've downloaded the files DO NOT FORGET TO ADD THE CODE TO THE TOP LINE THAT WAS DISCUSSED EARLIER! IT IS M3 S18000. WITHOUT THIS CODE YOUR SPINDLE WILL NOT TURN ON!
Step 7
Trimming out bars of material to their appropriate line size
I always trim out my material two line sizes greater than the line size of type that I am making, e.g. if I am making 8 line type I'll trim out my boards into 10 line bars. This leaves just enough room to trim out the type in the milling machine with an 1/8" end mill. I trim these out on my type saw with the shorter dimension (36.4 picas) being the length of all the bars. The final dimensions of the trimmed out bar for this example will be 10 line x 36.4 picas long. Once I'm finished trimming out all of my bars I go back and debur all of the edges and sand the bottom of them with 3600 micro mesh sanding pads until they are smooth.
Step 8
Lock up the material and begin carving
Set up your milling machine, install the appropriate tool, lock up the material, load your g-code, and begin carving. The photos below show how I lock up my material for both carving and trimming out the type. In the second photo you will notice a second piece of bamboo is placed in between the type bar and the toe clamps. This is to help transfer pressure from the toe clamps to the outside edges of the type bar when you are trimming out. If you don't do this there is a chance that the edge will become too thin and collapse under the pressure of the clamps and pinch the cutting tool.
Step 9
Trimming out the type
After you run your 1A carving file change the 60° v-bit to your 1/8" down cut bit. Make sure not to insert the 1/8" bit too far into the spindle, it needs to cut nearly all the way through the type bar. After it's installed double check to make sure your spindle won't crash into the material. Load the 1B file and trim out your type.
Once it's finished trimming out the type, take out the bar and gently break the type free from the remaining material. I use a small 1" chisel and a bench hook to clean up the bottom edges, it only takes light hand pressure. After that I use a hand sander made by Ultimation Modeling Tools with 400 grit sandpaper to gently sand each side (take off as little material as possible), this helps ensure that the sides of the type are exactly 90°.
Step 10
Finishing your type
With a small paint brush apply a liberal coat of jojoba oil to all surfaces. Trader Joe's sales a small bottle at a very reasonable price. After you apply the oil gently mop up some of the excess with a rag. If you don't get all of it that's okay, It absorbs and dries quickly.
When the finished type is dry, it's now ready to be used or proofed!

